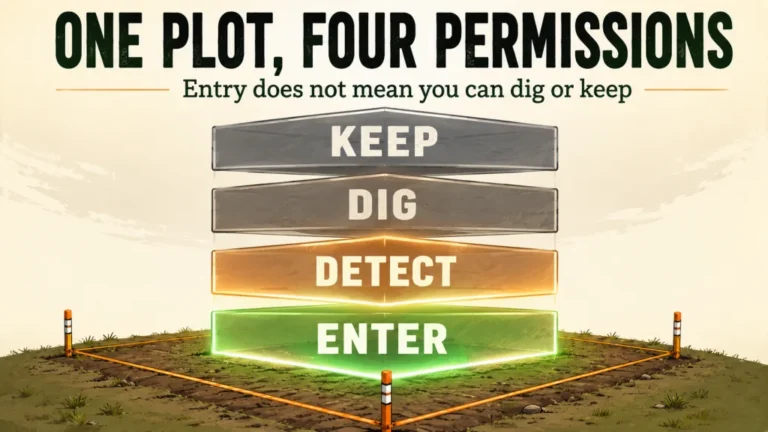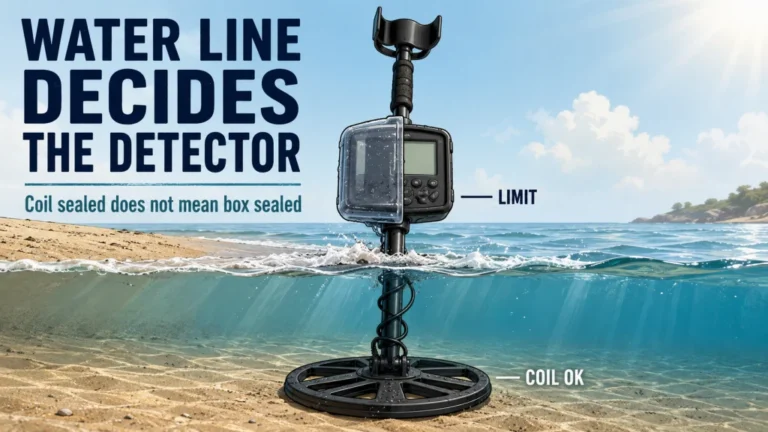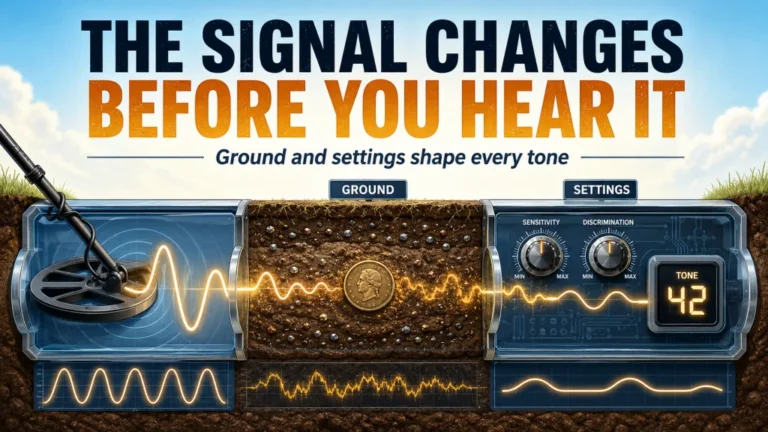

A working detector can still miss targets when setup, coil control, or diagnosis is wrong. Treat each hunt as a three-stage system: configure for the ground, cover it consistently, then test abnormal behavior one cause at a time. Mineralized soil, dense iron, wet salt, and electrical interference can change what works. This process gives you a repeatable routine instead of disconnected tips.
Metal Detecting Tips Start With the Whole Operating Path
Most metal detecting tips focus on one control or one swing habit, but missed targets usually come from the way several small decisions interact. A detector may power on, produce tones, and show target information while the wrong search mode, unstable sensitivity, lifted coil, or poor coverage pattern quietly reduces what the operator hears. I usually check ground balance and coil height before I ask what advanced settings someone is running, because a functioning machine and an effective setup are not the same thing.
The first mistake I see beginners make is changing several controls as soon as the detector becomes noisy. That feels productive, but it destroys the evidence needed to identify the cause. A better rule is simple: change one variable, repeat the same test, and keep the change only when the observed result improves.
This operating framework is for beginner-to-intermediate hobby detecting in the United States. It does not explain detector electronics in depth, recommend specific machines, research legal locations, or promise that better technique can create targets where few accessible targets exist. Its job is to help you operate the equipment you already own with more control and less guesswork.
Use a Three-Stage Field System
Learning how to metal detect well starts with a repeatable sequence, not a universal setting. The sequence keeps setup, movement, and diagnosis from getting mixed together. I divide the work into three stages because each stage asks a different question and produces a different kind of evidence.
| Stage | Main question | What success looks like | Common mistake |
|---|---|---|---|
| Configure | Is the detector stable and suited to this ground? | Expected ground response, understandable audio, and no unnecessary chatter | Copying another person’s settings without matching the site |
| Cover | Is the coil passing over the ground consistently? | Level coil travel, controlled speed, deliberate overlap, and a repeatable route | Moving fast enough to create gaps or clipped signals |
| Diagnose | What changed when performance became abnormal? | One suspected cause tested at a time | Resetting everything before identifying the cause |
The order matters. A poor configuration can make good coil control sound bad, while poor coil control can make a stable detector appear unreliable. Troubleshooting only becomes useful after you know what mode was running, how the coil was moving, and what the site was doing when the symptom appeared.
Key point: Do not use a setting change to compensate for a movement problem, and do not blame movement until the detector has been configured for the current ground.
That separation turns random experimentation into a decision path. Once you know which stage is failing, the next adjustment becomes much easier to choose.
Configure the Detector Before Chasing More Depth
Good settings are not the highest available settings. They are the settings that produce useful information in the current soil, target density, and electrical environment. A beginner should start with the manufacturer’s suitable preset, confirm that the machine is stable, and adjust only when the site gives a clear reason.
Quick operating terms:
- Search mode: a starting package of audio, acceptance, and processing choices intended for a type of site or target.
- Ground balance: the detector’s method for accounting for the ground response so soil is less likely to dominate the signal.
- Discrimination: the choice to report, alter, or reject parts of the target-response range.
- Recovery speed: how quickly the detector can separate nearby responses, with trade-offs that depend on the machine and site.
These controls solve different problems. Treating them as four versions of a depth control is one reason a stable preset can become noisy and confusing within minutes.
Match the Search Mode, Then Handle Electrical Noise
Search modes are starting packages, not guarantees. Choose the mode closest to the site, then confirm it over known objects or repeatable natural targets before making custom changes.
Noise cancel or frequency shift addresses electromagnetic interference, not soil mineralization. If the detector chatters while the coil is still and away from metal, follow the manual’s noise procedure before lowering sensitivity.
Separate Ground Response From Excess Sensitivity
Ground balance helps the machine account for soil response, but detectors and modes handle it differently. Follow the exact manual because a number copied from another machine has no dependable meaning.
Field Note: The ground-balance question comes up on almost every permission hunt I run in this region. New detectorists assume one setting works everywhere, but mineralized soil beside an old foundation can read completely differently from open pasture fifty yards away. When the ground response changes, I treat the previous balance as a starting point, not a permanent answer.
Use the highest sensitivity that remains usefully stable. Constant false responses can hide faint targets, so reducing sensitivity may recover clearer information rather than merely losing depth.
Use Discrimination, Tones, and Recovery Speed as Information Controls
Discrimination changes what the detector reports, not what is in the ground. Heavy rejection can quiet trash but may break up desirable targets near iron or blocked response ranges. Beginners often remove the uncertain signals they most need to learn.
Target tones should reduce mental load. Use an arrangement you can distinguish while moving, and value compact, repeatable audio over a jumping screen number.
Recovery speed affects separation between nearby responses, with trade-offs that vary by detector and site. Test it against the actual target spacing instead of treating one value as universally best.
Saved profiles need context: site type, coil, mode, ground, and reason for each change. A profile labeled only “best” becomes a mystery in different soil.
These controls deserve deeper treatment than an overview can provide. Use the detector settings walkthrough when the symptom begins before the first sweep or changes with the ground and electrical environment.
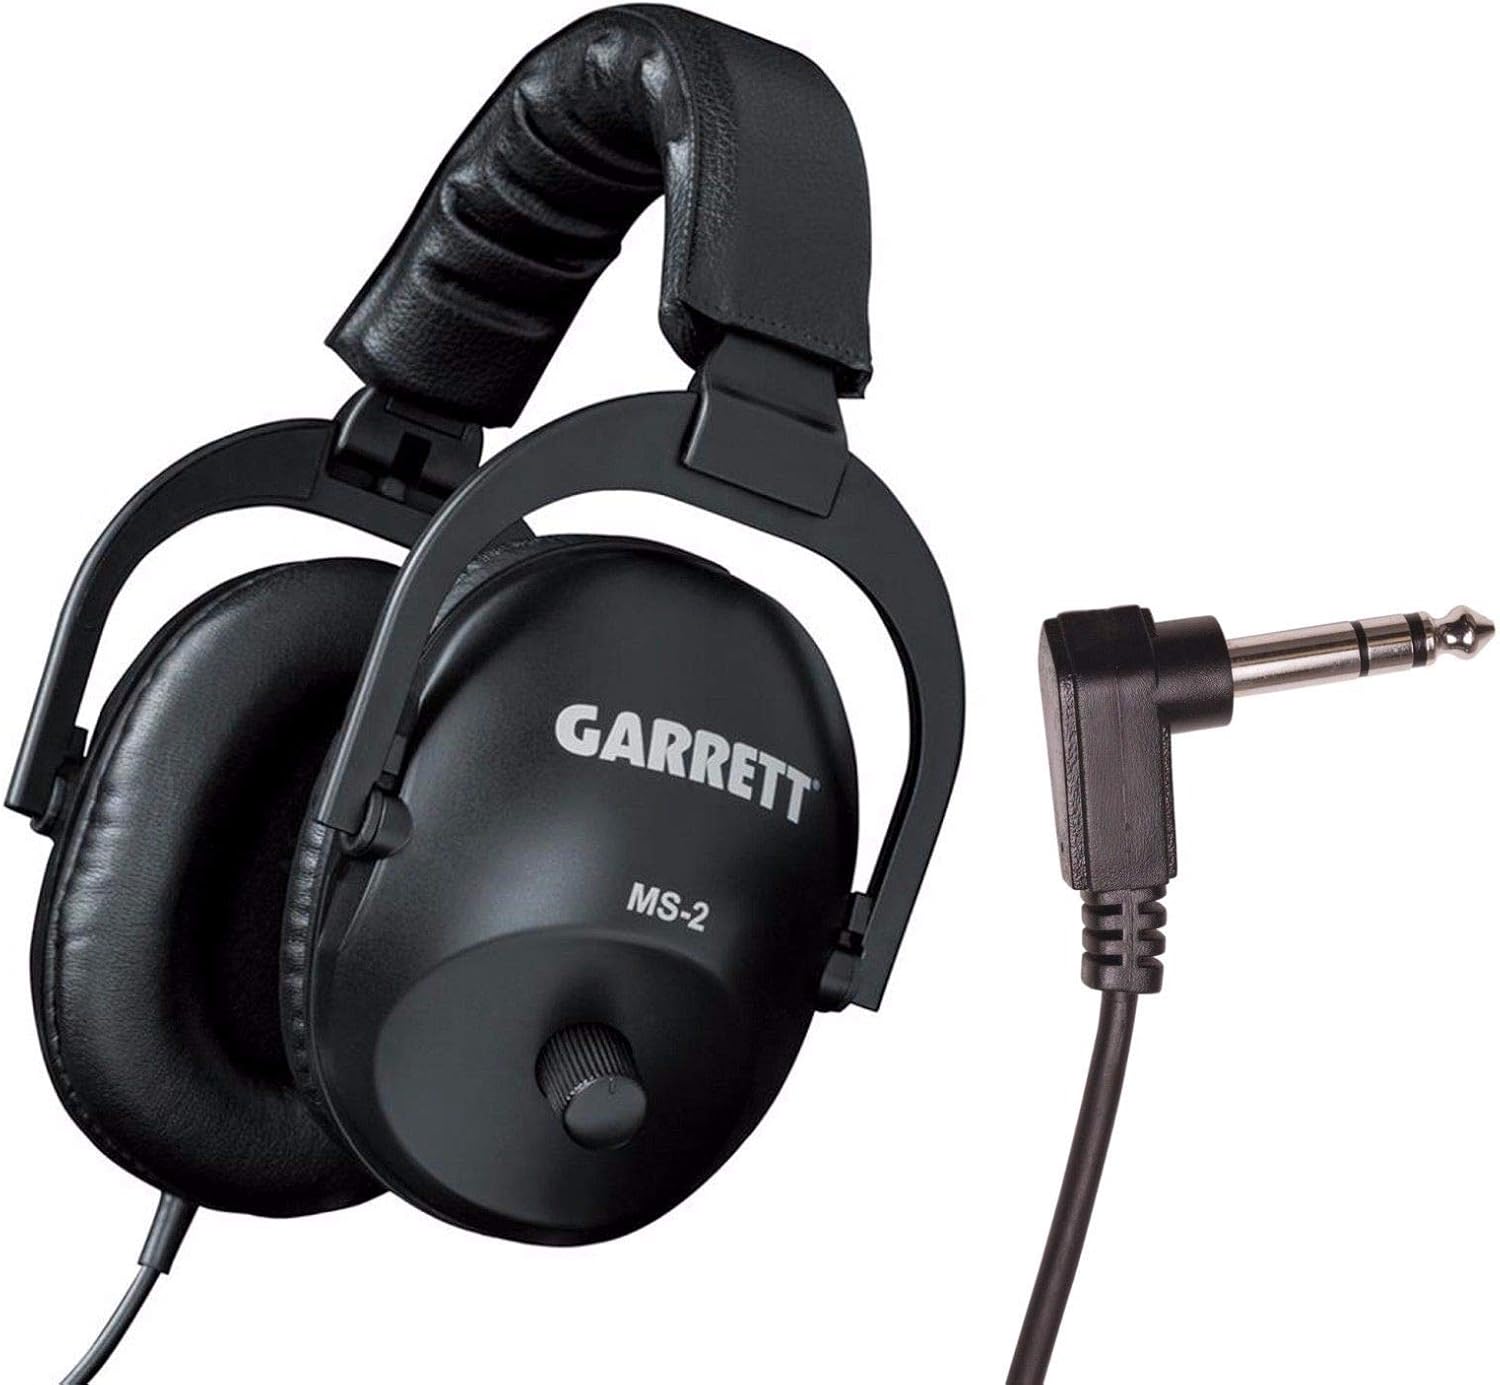
Garrett MS-2 Headphones use a 1/4-inch right-angle stereo plug for detector audio connections. They include volume control for adjusting signal levels while detecting. The headphones also have a padded headband, ear pads, and a reinforced coiled cable.
Check On AmazonIf you click this link and buy, we earn a commission at no additional cost to you.
Cover Ground So the Coil Can Do Its Job
Settings cannot recover ground the coil never passed over. The most dependable metal detecting techniques are therefore less dramatic than the controls on the screen: fit the shaft, keep the coil travel controlled, and use a route that makes missed strips visible. Efficient coverage is not the fastest walking pace; it is the most ground you can examine without degrading signal quality.
Fit, Coil Height, and Sweep Speed Work Together
Adjust the shaft and arm cuff so the coil reaches the ground without forcing the shoulder or wrist. Poor fit makes the coil rise at the arc ends as fatigue develops.
Keep the coil low and level without dragging it through soil, roots, or stubble. Strikes can create false responses, while excess height weakens faint signals.
Match sweep speed to the detector, mode, target density, and ground. Move slowly enough to stop over and repeat a questionable response; clipped audio is not useful coverage.
Overlap Based on Risk, Not a Fixed Percentage
No overlap percentage fits every coil, target, and terrain. Move so the coil’s sensitive center examines ground reached only by the edge on the previous pass, and tighten overlap where masking risk is higher.
Use a straight grid for complete coverage and a looser pattern only for reconnaissance. My surveying background taught me not to trust memory once work is interrupted, so I choose visible reference points before the first recovery. A few holes, detours, and target checks can make an improvised route impossible to reconstruct. When repeatable targets appear, tighten the route and cross the area from another direction to test masking.
Pro Tips: Use visible landmarks, footprints, flags where permitted, or natural edges to keep the route honest. Memory is less reliable after several recoveries, especially in open ground with few reference points.
Confirm the Target Before Pinpointing
Target confirmation and pinpointing solve different problems. Confirmation asks whether the response repeats and how it changes from another direction. Pinpointing asks where to place the recovery opening after you have decided the target deserves investigation.
When a signal appears, shorten the sweep, keep the same coil height, and approach from another direction. If it disappears, note whether it behaved like a one-way iron response, a coil-edge response, or a false signal.
Use pinpoint according to the manual or make controlled crossing passes. Practice over visible objects so you learn where the strongest response sits beneath your coil and avoid oversized holes.
For a complete movement sequence, use the swing technique walkthrough to refine fit, sweep path, overlap, target confirmation, and pinpointing as one connected skill.

Garrett Pro-Pointer AT provides three sensitivity levels for locating metallic targets. Its fast retune function narrows the detection field to help improve pinpointing precision. A single button controls power, retune, sensitivity adjustment, and stealth mode.
Check On AmazonIf you click this link and buy, we earn a commission at no additional cost to you.
Diagnose Abnormal Behavior Before Changing Everything
Useful metal detecting advice begins with the symptom, not the favorite fix. False signals, silence, and weak results can share causes, but they do not prove the same failure. I start by asking what changed immediately before the problem appeared: location, ground, mode, battery state, cable position, coil contact, weather, or a software setting.
False Signals: Test Environment, Ground, Then Hardware
If the detector chatters with the coil still, suspect electrical interference before swing technique. Run noise cancel, move from likely sources, and test sensitivity. If it is quiet while still but noisy during the sweep, ground response, coil contact, cable movement, or carried metal becomes more likely.
Hot rocks and abrupt mineral changes can resemble targets. Compare directions and coil heights, then check the current ground-balance procedure before accepting or rejecting the response.
Inspect the connector, cable routing, strain points, and coil cover before blaming electronics. Clean or reconnect only as the manufacturer permits, especially around waterproof seals. If securing the cable stops the noise, correct the routing first; if inspection confirms a damaged cable, connector, cover, or other compatible component, replacement may solve the field problem that settings cannot.
No Response or Weak Results: Verify the Complete Signal Path
A silent detector may have a rejected pattern, muted audio, incorrect mode, or failed headphone connection. Test a known object, confirm audio routing and accepted ranges, and use factory reset only after recording the setup and completing simpler checks. When a headphone lead or adapter fails a repeatable movement test, correct the confirmed connection fault instead of tuning the detector around it.
Weak results may occur while the detector is normal. Check power, coil connection, ground balance, stable sensitivity, mode, and coil height before comparing with another hunt, because soil, target orientation, moisture, iron, and search path can change the result.
Check firmware when the manufacturer documents a relevant fix or compatibility issue. Software is one branch of diagnosis, not the automatic answer to instability.
Make Each Test Answer One Question
Keep each test narrow. Move without changing settings to test the environment, lower sensitivity alone to test stability, or secure the cable alone to test movement noise.
This method is slower for a few minutes and much faster over a season. When the problem needs a deeper decision tree, use the metal detector troubleshooting process to separate EMI, ground response, power, audio, coil, connection, and software causes.
Match the Symptom to the Right Process
The fastest next step is to identify which part of the operating path is breaking down. Use the symptom and timing below to choose the resource that addresses the real problem rather than applying another random adjustment.
| What you notice | Likely stage | Next step |
|---|---|---|
| The detector is unstable before normal sweeping, changes with soil, or becomes difficult after a mode adjustment | Configuration | Set up detector controls for the site |
| Signals are clipped, coverage has gaps, the coil rises, or targets are difficult to confirm and locate | Ground coverage | Improve coil control and target confirmation |
| False signals, silence, weak response, intermittent audio, or unexplained behavior continues after basic setup | Diagnosis | Trace the symptom one cause at a time |
Choose one path first. If the evidence later points to another stage, carry the notes forward instead of restarting from assumptions.
Keep an Operating Record That Can Explain the Result
Improvement becomes difficult when every hunt starts from memory. My operating framework records enough context to recreate the setup without turning the field into a laboratory. The purpose is not paperwork; it is to stop the same unexplained problem from appearing as a new mystery on the next visit.
- Detector and coil: the exact machine, coil, and any relevant connection or accessory state.
- Mode and profile: the starting mode, saved profile, and major acceptance or audio choices.
- Ground: soil type, visible mineral changes, moisture, salt influence, hot rocks, or dense iron.
- Site conditions: target density, electrical interference, nearby metal structures, vegetation, and terrain.
- Target conditions: repeatability, direction, nearby iron, apparent size, and whether the response changed after opening the ground.
- Settings changed: one adjustment at a time, including the reason for the change.
- Observed result: what became quieter, clearer, weaker, stronger, or unchanged.
The last line is the one most people skip. Writing “lowered sensitivity” is not a useful conclusion. Writing “lowered sensitivity one step; stationary chatter stopped; known test target remained repeatable” creates a result you can compare later.
This record also helps improve metal detecting results without pretending every better hunt came from a control change. Sometimes the log shows that the machine was stable and coverage was consistent, but the site simply offered few accessible targets. That is a useful answer because it prevents endless tuning of equipment that was not the limiting factor.

This Rite in the Rain pocket notebook contains 100 pages of weatherproof paper. The paper is designed to repel water, sweat, grease, and mud during outdoor use. Its impact-resistant Wire-O binding helps keep the open pages aligned and intact.
Check On AmazonIf you click this link and buy, we earn a commission at no additional cost to you.
Label the Evidence Before Trusting the Conclusion
Not every piece of metal detecting advice carries the same weight. A direct observation from one site, a controlled comparison, a manufacturer’s operating instruction, and a research-based explanation can all be useful, but they answer different questions. Labeling the evidence keeps a local result from turning into a false universal rule.
| Evidence label | What it supports | Main limitation |
|---|---|---|
| Direct field observation | What happened with a stated machine, coil, ground, and site condition | May not transfer to different equipment or terrain |
| Controlled test | Whether one changed variable affected a repeatable target or symptom | A test target does not reproduce every buried-target condition |
| Official manual instruction | The correct procedure and operating limits for the exact detector | May explain operation without covering every field condition |
| Research-based explanation | A pattern supported by technical sources and experienced community reports | Needs confirmation on the reader’s own equipment and site |
Use manual instructions for procedures, controlled tests for cause and effect, field observations for context, and broader research for recurring patterns. The strongest operating decision usually comes from more than one label pointing in the same direction.
This approach also makes disagreements easier to understand. Two detectorists can report different “best” settings and both be describing their own conditions accurately. The mistake begins when either result is presented without the ground, coil, mode, target density, and stability limit that produced it.
Know What Better Operation Cannot Fix
Technique can recover performance lost to poor setup, coverage, and diagnosis. It cannot change unsuitable detector technology, fix incompatible equipment, authorize prohibited access, or guarantee finds where targets are scarce, inaccessible, or heavily masked.
Reducing sensitivity may quiet a machine poorly matched to wet salt, but it cannot remove the technology mismatch. Recovery speed also cannot help when the coil cannot reach between roots, rocks, or dense debris.
Operating skill also cannot replace legal access or land research. When the detector is stable, coverage is disciplined, and diagnosis shows no fault, equipment or site conditions may be the limiting factor.
Warning: Do not continue detecting where access is prohibited or permission is unclear. Operating technique never overrides land rules, site restrictions, or the owner’s conditions.
Knowing these limits tells you when to stop tuning and reconsider equipment compatibility, access, or terrain.
Use a Final Pre-Hunt and Post-Hunt Checklist
A checklist should protect the decisions most likely to be forgotten, not restate the whole manual. I use the pre-hunt check to establish a known starting condition and the post-hunt check to preserve what the day taught me. That makes the next outing a continuation instead of another restart.
Before the First Sweep
- Confirm legal access and the boundaries of the area you may detect.
- Inspect the coil, cable, connector, shaft locks, arm cuff, and battery state.
- Select the mode that best matches the site and confirm the correct coil or profile is loaded.
- Run noise cancel or frequency shift according to the manual when the detector supports it.
- Ground balance when the detector, mode, and soil conditions require it.
- Set sensitivity for stable operation rather than the highest displayed level.
- Pass a known object across the coil to confirm audio, target response, and pinpoint behavior.
- Choose a coverage route before moving into the search area.
If the known-object check fails, stop before entering the field pattern. It is easier to diagnose audio, rejection, connection, or power issues at the starting point than after an hour of silent coverage.
Before Packing the Detector Away
- Record the machine, coil, mode, ground, site conditions, and meaningful settings changes.
- Describe the observed result of each change, including changes that did not help.
- Inspect the coil cover, cable, connector, and shaft for dirt, moisture, movement, or damage.
- Clean and store the equipment only as the manufacturer instructs.
- Recharge or replace power sources before the next outing when needed.
- Separate unresolved symptoms from normal poor-site results.
- Choose one question to test on the next hunt instead of rewriting the entire setup.
The checklist is intentionally conservative. It helps the operator learn the machine without turning every quiet hour into a crisis or every good target into proof that one setting is universally correct.

This Minelab carry bag uses padded reinforced canvas to protect a metal detector during transport and storage. It is designed to accommodate metal detectors across different brands and models. An integrated pocket provides additional space for small accessories, batteries, tools, or finds.
Check On AmazonIf you click this link and buy, we earn a commission at no additional cost to you.
Final Thoughts: Build Repeatable Skill, Not a Perfect Settings Screen
The best operating system is one you can repeat and explain. Configure the detector for the ground, cover the site with controlled movement, and diagnose abnormal behavior one variable at a time. Those three habits make it possible to tell the difference between an equipment problem, a technique problem, difficult ground, and an unproductive search area.
I would rather see a new detectorist use a stable preset with disciplined coil control than copy an advanced setup that cannot be explained. Start with a known baseline, record each change, and let the observed result decide the next move. That is how disconnected tips become dependable field judgment.
FAQs
⚙️ Which metal detecting tips for beginners matter first?
Start with the manufacturer’s preset that best matches the site, keep the coil low and level, and change only one variable at a time. Those habits create a stable baseline, which is more useful on a first hunt than copying an advanced settings screen.
📡 Why does my metal detector beep when no target is there?
Possible causes include electrical interference, mineralized ground, a moving coil cable, coil strikes, excessive sensitivity, nearby carried metal, or a connection problem. First note whether the noise occurs with the coil still or only while sweeping, because that separates the diagnosis into different paths.
🌱 How close should I keep the coil to the ground?
Keep it as low and level as the terrain safely permits without scraping, striking obstacles, or repeatedly flexing the coil. Consistent height matters more than forcing the coil against rough ground.
🐢 Am I swinging my metal detector too fast?
You are probably moving too fast if signals sound clipped, you cannot stop over the response, or your forward steps create visible coverage gaps. Slow down until questionable signals can be repeated and checked from another direction.
🔊 Should I use high discrimination to avoid trash?
High rejection can reduce unwanted audio, but it may also break up desirable targets near iron or within rejected response ranges. Begin with a moderate preset, learn repeatable tones, and increase rejection only for a specific site problem you understand.
🧭 How do I know whether the site or my detector is the problem?
Verify the detector with a known object, confirm stable settings, and use a controlled coverage pattern. If the machine responds normally and no hardware or environmental symptom appears, the site may simply contain few accessible targets.
Sources and References
- Minelab metal detecting frequently asked questions: manufacturer guidance on ground balance, electromagnetic interference, sensitivity, mineralized soil, and why detection results depend on target and ground conditions.
- Minelab troubleshooting workflow for unstable signals: official symptom-based checks covering electrical interference, sensitivity, ground balance, reset procedures, and coil-related faults.
- Garrett search-coil and ground-balance instructions: manufacturer operating guidance on level coil travel, constant height, ground response, sensitivity, and hot-rock behavior.
- DetectorProspector discussion of electromagnetic interference: experienced community observations on identifying and reducing EMI-related instability.
- TreasureNet false-signal troubleshooting discussion: community reports involving cable movement, coil connections, sensitivity, and repeatable field checks.